

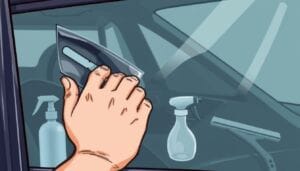
The cleanest way to remove window tint is heat plus patience. Heat the film, peel slowly, then deal with the adhesive that gets left behind. You can do it in a driveway with a steamer or a heat gun, but the rear window on most vehicles is the panel where DIY removal goes wrong, and that is the one we end up fixing most often at our Wylie shop.
This is the process we use when a vehicle comes in for a tint refresh. The same process works at home if you take your time.
Table of Contents
ToggleWhat you need
A heat source. Either a fabric steamer, a household garment steamer, or a heat gun on a low setting.
A plastic razor, not metal. Glass cleaner with no ammonia. A microfiber. Soapy water in a spray bottle. A bin liner to catch peeled film.
A metal razor will scratch the glass. Ammonia damages tint adhesive in a way that can spread to defroster lines on the rear glass. Use plastic and use ammonia-free cleaner.
The front side and rear side windows
Roll the window down about an inch.
Heat the inside of the glass at the top edge for 30 seconds with the steamer or the heat gun on low. The film softens and the adhesive softens with it.
Lift the corner with a fingernail or a plastic razor. Peel slowly, keeping the film at a flat angle to the glass. Pull straight back, not up. If the film starts to tear into strips, you are pulling too fast or the glass is not warm enough. Add more heat.
A clean peel pulls most of the adhesive with the film. A bad peel leaves adhesive in patches. Take your time and work in steady passes across the panel.
The rear window is the hard one
The rear window has defroster lines baked onto the inside of the glass. Those lines are conductive metal and they can be torn off with the film if you are not careful.
The safest method on the rear glass is steam, not a heat gun. Steam heats more evenly and does not concentrate heat in one spot the way a heat gun does.
Heat a section of the rear glass with the steamer for one to two minutes. Lift the corner gently. Peel parallel to the defroster lines, not across them. If a line lifts with the film, stop, lower the heat, and try a different corner.
Some shops will tell you the only safe way to remove rear tint at home is in the sun. Park the car in direct Texas sun for a few hours, get the inside of the glass warm to the touch, then peel. This works in summer. It does not work in January.
Adhesive cleanup
After the film is off, the inside of the glass usually has a residue of adhesive left behind. The amount depends on how old the film was and how clean the peel was.
Spray the glass with soapy water. Let it sit for a minute. Use a plastic razor at a low angle to scrape off the adhesive in long passes. Re-spray as needed.
For stubborn adhesive, an adhesive remover spray designed for automotive use will dissolve what the soapy water cannot. Apply it to a microfiber, not directly to the defroster on the rear glass.
Finish with ammonia-free glass cleaner and a clean microfiber. The glass should look like factory glass with no haze, no streaks, no residue.
What can go wrong
Defroster lines lifted off the rear glass. This is the most common DIY failure. Once the lines are gone, the rear defroster does not work, and replacement is expensive enough that it is often a write-off.
Scratched glass from a metal razor. A small scratch from a metal blade is permanent. Plastic razors only.
Adhesive left behind that will not budge. Old film that has been on a car in DFW heat for many years can leave adhesive that has effectively baked into the glass. This needs more aggressive solvents and more time.
Film that tears into strips during peel. This usually means the film was not heated enough or was old enough that the topcoat is degraded. The fix is more heat and slower peeling.
When to bring it to a shop
If the rear glass has aged film that does not want to peel, bring it in. We have steamers sized for full panel work, the right adhesive solvents, and the patience to peel rear glass without lifting defroster lines.
If you are having the car re-tinted anyway, the removal is part of the new install conversation. We do removal as a standalone service or built into a fresh tint job.
Pricing for tint removal depends on the vehicle and the condition of the existing film. We quote per car.
Re-tinting after removal
The glass needs to be fully clean before new film can be installed. Any leftover adhesive becomes a visible bump under the new film.
We carry Llumar IRX, 3M Crystalline, and Suntek for re-tint work. Ceramic tint full vehicle runs $450 to $700. Carbon tint full vehicle runs $250 to $375.
Cure times after a fresh install run three to seven days in summer Texas heat and two to three weeks in winter. The windows will look slightly hazy or have small water bubbles during cure. That is normal.
Texas tint laws to keep in mind for the new install
Front side windows have a 25 percent VLT minimum. Windshield strip is allowed on the top 5 inches. Rear side and rear windows can be any darkness. Reflective film maxes at 25 percent on front sides. Medical exemption is available.
If your old tint was darker than legal on the front sides, the re-tint is your chance to get within the law without paying twice.
Tools and time estimate
A complete DIY tint removal on a four-door sedan, done carefully, runs three to five hours. SUVs run longer because of the size of the rear glass.
The job is not hard. It is slow. Rushing it is what creates the problems.
Where we work
Our Wylie shop covers Plano, Frisco, Allen, Garland, Rockwall, Murphy, Sachse, and Lavon for tint removal, fresh tint installs, and headlight tint.
*This article was drafted with the help of AI and reviewed by the Shell Shocked Wraps team.*
